Blog

  • EMS Facial Devices Review: FaceGym Pro vs YA-MAN MediLift

    EMS Facial Devices Review: FaceGym Pro vs YA-MAN MediLift

    Electric muscle stimulation (EMS) facial devices have leapt from professional studios to bathroom shelves, promising lifted contours, firmer skin tone, and a more energized complexion. In this review, we break down how EMS works, what to expect from regular use, and how two standout devices compare in performance, comfort, and value.

    How EMS Facial Toning Actually Works

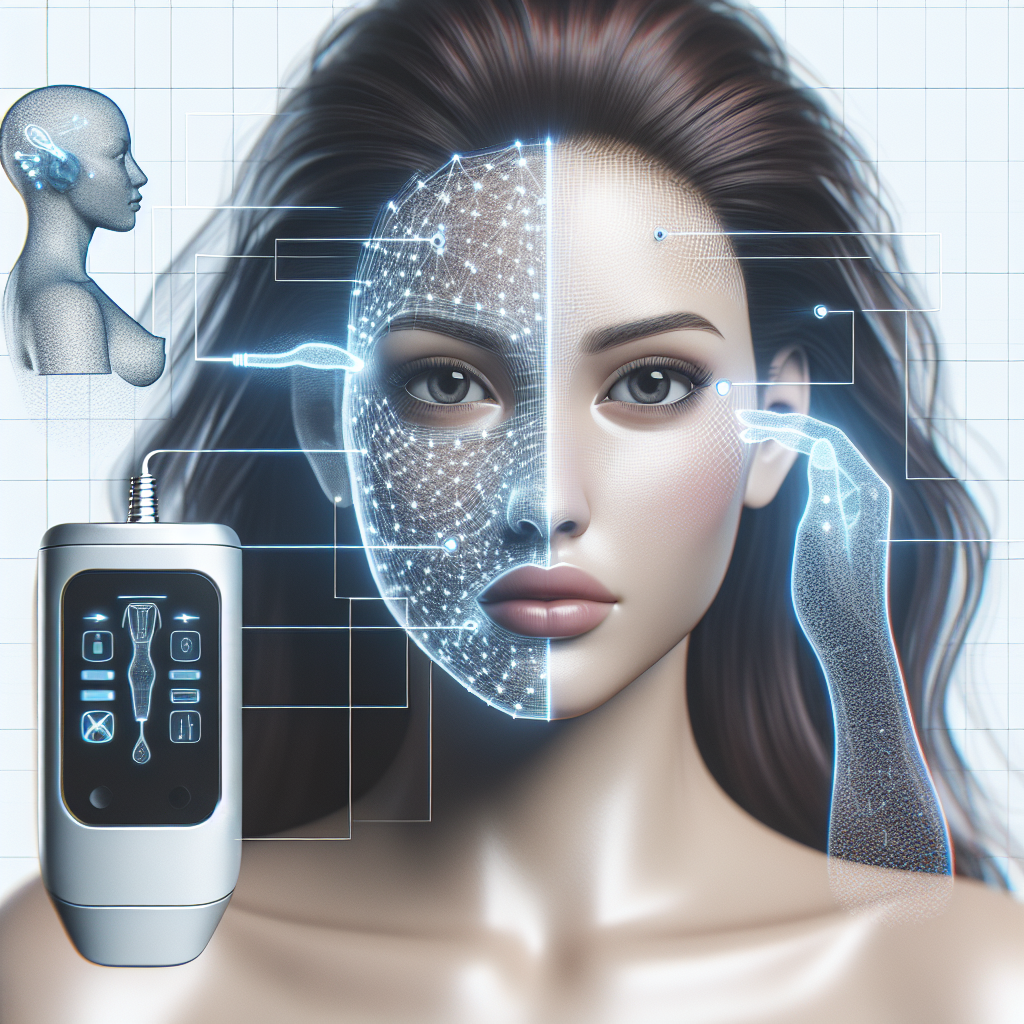
    EMS sends gentle electrical impulses that trigger superficial facial muscles to contract. Unlike microcurrent, which primarily targets the skin and underlying tissues with a subsensory current, EMS is more perceptible and focuses on the muscles themselves. Those rhythmic contractions help improve muscle tone and can temporarily refine features like the jawline and cheek area. Over weeks, consistent sessions can enhance facial definition, complementing skincare routines that address texture and pigmentation.

    The key variables are waveform, frequency, and intensity. Low to mid frequencies with well-shaped pulses typically feel comfortable yet effective. Too little intensity yields minimal toning; too much can fatigue muscles or irritate the skin. The sweet spot is a strong-but-tolerable contraction, applied methodically and not overdone.

    What You’ll Need

    • Conductive gel or serum: Ensures even current delivery and better glide. Avoid oils that block conductivity.
    • Cleanser: Start with a clean, makeup-free face to prevent irritation.
    • Soft cloth or alcohol wipes: For sanitizing device heads or mask pads after use.
    • Mirror with good lighting: Helps you follow muscle paths accurately.
    • Notebook or phone reminders: Track intensity levels and session frequency.

    Recommended Products

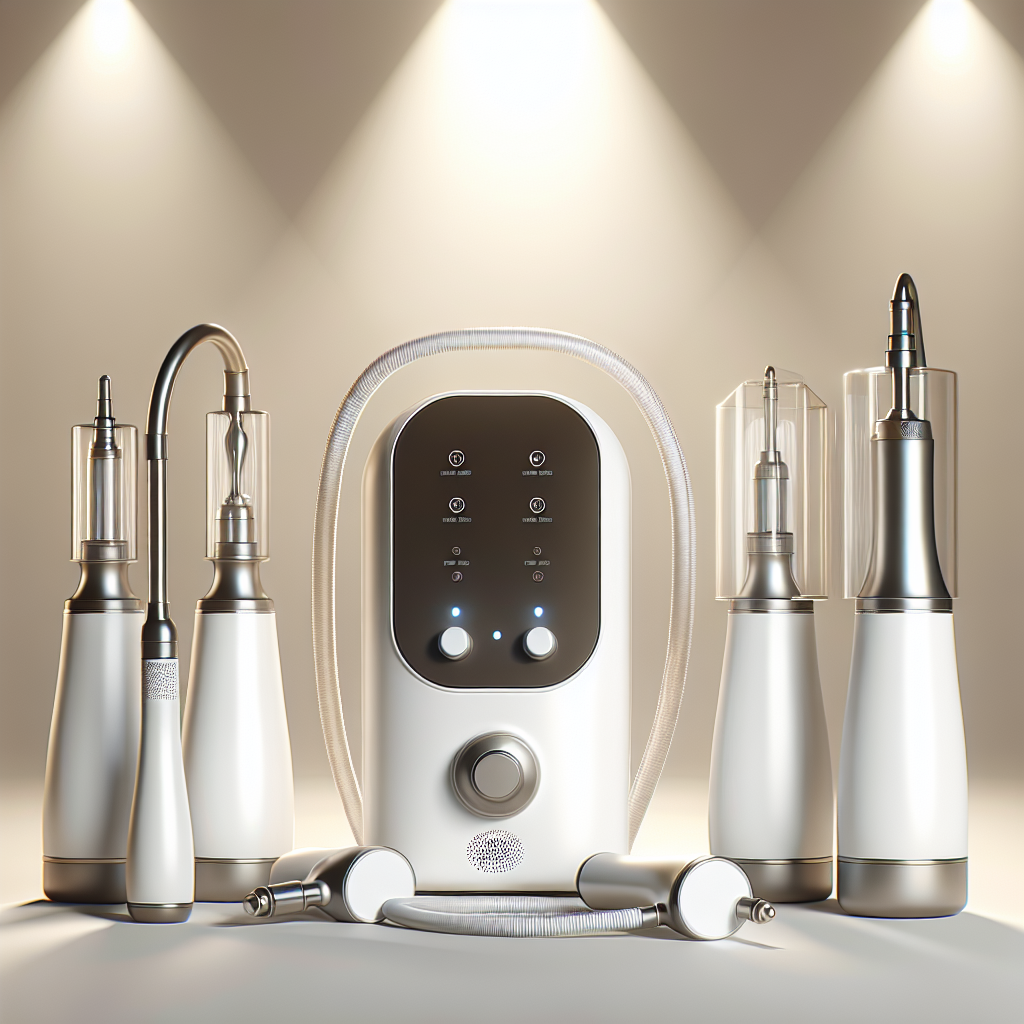
    For at-home EMS, two devices consistently impress in both build quality and results. Each targets muscle toning but takes a different approach—one handheld and sculptural, the other a mask that handles multiple zones simultaneously.

    Hands-On Review: FACEGYM FaceGym Pro EMS Facial Toning Device

    For users who want control and craft-like precision, the handheld FACEGYM option delivers. It’s ergonomic, with interchangeable or multi-node heads (depending on model) that let you trace along the zygomatic arch (cheekbone), jawline, and brow. In testing, the contractions feel distinct yet smooth, with enough headroom to progress intensity over time.

    What stands out is the ability to linger on areas that need extra attention (for example, softening the appearance of jowls or lifting the cheek pads). The learning curve is modest: after two or three sessions, most users will establish a repeatable routine. Battery life typically covers multiple sessions per charge, and the interface makes it easy to move between levels without breaking flow.

    Pros

    • Targeted control for sculpting and asymmetry correction.
    • Strong, consistent pulses with incremental intensity steps.
    • Portable, with straightforward cleaning and storage.

    Cons

    • Requires manual technique and both hands free.
    • Smaller contact area means sessions can take longer for full-face coverage.

    Those who enjoy a ritualistic, hands-on approach will appreciate the fine-tuning and muscle-specific passes. If that’s you, check out the FACEGYM FaceGym Pro EMS Facial Toning Device on Amazon for a detailed, athletic-style routine.

    Hands-On Review: YA-MAN MediLift Plus EPM-18BB Facial EMS Mask

    In contrast, the YA-MAN mask is about consistency and convenience. The strap-on silicone design aligns electrodes over key muscle groups—particularly the zygomaticus and masseter zones—so you can simply apply conductive gel, secure the mask, and let the program run. It’s ideal for multitaskers who want to free their hands while they read or tidy up.

    Intensity ramps are well-calibrated, and the mask applies pulses over wider surface areas, creating a coordinated activation that feels efficient. Setup is quick; routine is repeatable; and because the mask sits flush, conductivity tends to be uniform (as long as you use sufficient gel). Cleaning is as simple as a quick wipe-down of the pads and interior.

    Pros

    • Hands-free operation encourages consistent use.
    • Even coverage across cheeks and lower face.
    • Clear program modes make it beginner-friendly.

    Cons

    • Less micro-targeting versus a handheld wand.
    • Fit matters; those with very small or larger faces may need extra adjustment time.

    If simplicity keeps you on track, we recommend the YA-MAN MediLift Plus EPM-18BB Facial EMS Mask, which brings studio-style toning to a set-and-forget routine.

    Setup and a Sample 4-Week Routine

    1. Prep: Cleanse thoroughly and pat dry. Apply a thin, even layer of conductive gel wherever electrodes will touch.
    2. Warm-up (Week 1): 10–12 minutes, 3–4 times per week on low-medium intensity. Aim for a firm but comfortable contraction; no twitching or discomfort.
    3. Build (Weeks 2–3): 12–15 minutes, 4–5 times per week. Increase intensity gradually as tolerance improves, especially in sturdier areas like the jaw.
    4. Maintain (Week 4 onward): 10–15 minutes, 3–4 times per week. Consider a slightly higher intensity 1–2 times weekly for a “booster.”
    5. Post-care: Wipe device/mask pads with alcohol wipes or a damp cloth. Rinse off gel and follow with hydrating serum and a barrier-supportive moisturizer.

    Tip: Keep a light hand around the periorbital area and stay clear of the thyroid region. For symmetry, mirror each pass on both sides of the face with similar duration and intensity.

    Results You Can Expect

    Immediate post-session effects often include a temporary “lifted” look and improved circulation, which can translate to a brighter complexion. Over two to four weeks, users commonly report a more defined jawline, perkier cheeks, and a subtle softening of nasolabial folds. EMS does not replace fillers or surgery; instead, it conditions muscles so the face appears more energized and supported—especially noticeable in the midface and along the mandibular line.

    For best outcomes, pair EMS with daily sun protection, a retinoid or peptide routine at night, and steady hydration. Muscles respond to consistent training; skipping weeks can reduce the cumulative effect, much like pausing gym workouts.

    Safety, Sensations, and Who Should Avoid EMS

    A properly used EMS device feels like deep, rhythmic pulsing or tightening. It should not sting or burn; that typically indicates insufficient gel, poor contact, or too high an intensity. Always begin low and increase gradually.

    • Good candidates: Adults seeking noninvasive toning, mild-to-moderate lifting, and improved definition. Great for desk workers with “tech neck” slackness or people wanting a pre-event boost.
    • Use caution: Reactive or compromised skin barriers, recent in-office procedures, or persistent breakouts along electrode paths.
    • Avoid: Pacemakers or implanted electronic devices, epilepsy, pregnancy (unless cleared by a clinician), open wounds, active infections, or severe dermatologic conditions along treatment areas.

    Troubleshooting and Maintenance

    • Spotty contractions: Add more conductive gel and press electrodes firmly but gently. Ensure even contact over curves like the cheekbone.
    • Facial asymmetry: Spend equal time on both sides, but start with the weaker side so it gets fresher effort and focus.
    • Skin redness: Lower intensity, shorten sessions, or reduce frequency. Most mild redness fades quickly, but persistent irritation means it’s time to pause.
    • Hygiene: Wipe heads or mask pads after every use and deep-clean weekly. Replace pads if your device uses consumables and they lose stickiness or conductivity.
    • Progress tracking: Take consistent, well-lit photos weekly at the same time of day to objectively gauge changes.

    Value for Money and Choosing the Right Device

    If you’re disciplined and enjoy detailing each muscle pathway, the handheld approach offers maximum control and nuanced sculpting. It’s excellent for tailoring intensity to different regions and for users who want “gym-like” sessions. Meanwhile, a mask-based design excels at adherence—easy setup and hands-free consistency. For many, that reliability produces better long-term results because it reduces friction and excuses.

    • Best for precision: The handheld route excels for customized contouring and addressing asymmetries.
    • Best for convenience: The mask format wins for set-and-forget routines and even coverage.
    • Budgeting tip: Pricier devices with durable materials, strong batteries, and stable output are often more cost-effective over a year of use than cheaper, inconsistent models.

    Ultimately, consider your lifestyle. If you love techniques and shaping passes, a handheld EMS style is likely your match. If you need simplicity to stay consistent, a mask-style unit will keep you on schedule with fewer steps.

    Frequently Asked Questions

    How quickly will I see results?

    Many users notice a temporary lift right after each session, with clearer definition emerging around weeks two to four. The more consistent you are, the more visible the cumulative toning becomes.

    Can I combine EMS with other skincare devices?

    Yes—on different days from exfoliating tools or strong actives. On EMS days, keep your routine gentle and hydrating. Never stack devices in the same session unless the manufacturer explicitly supports it.

    How do I set the right intensity?

    Choose the lowest level that produces a comfortable, visible contraction. Increase only when that sensation becomes too easy. More is not always better; aim for steady, sustainable sessions.

    Conclusion

    EMS facial toning can be a powerful ally for lift, definition, and a fresher-looking face—provided you use it consistently and wisely. Handheld devices shine for sculptors who want precision and control, while mask formats reward those who prioritize convenience and repeatability. If you gravitate toward tailored routines and detailed contour work, the FACEGYM FaceGym Pro EMS Facial Toning Device offers targeted, athletic-style training. If you prefer effortless setup and even coverage, the YA-MAN MediLift Plus EPM-18BB Facial EMS Mask streamlines the process. Choose the format that fits your lifestyle, commit to a manageable schedule, and expect your features to look progressively more lifted and energized over the coming weeks.

    Recommended Products

    Ready to get started? Check out these top-rated products:

  • Microcurrent Facial Devices: Benefits and Buying Guide

    Microcurrent Facial Devices: Benefits and Buying Guide

    Microcurrent facial devices bring spa-style toning to your vanity by delivering low-level electrical current that encourages a more lifted, sculpted look with consistent use. Whether you want to soften the appearance of fine lines, add definition to cheekbones, or freshen your complexion before an event, understanding how these tools work helps you choose the right device and routine for visible, repeatable results.

    How Microcurrent Works Under the Skin

    Microcurrent uses tiny pulses of electricity—measured in microamps—that mimic your body’s own bioelectric signals. This gentle energy is believed to support cellular ATP (adenosine triphosphate) production, which fuels processes involved in skin vitality and helps “re-educate” facial muscles. The result is a temporary improvement in tone and contour, plus a refreshed look thanks to better circulation and lymphatic flow.

    Microcurrent vs. EMS: What’s the Difference?

    It’s easy to confuse microcurrent with EMS (electrical muscle stimulation), but they serve different purposes. Microcurrent operates at a subsensory level; most users feel little to nothing when conductivity is adequate. It aims to enhance natural function without forcing strong muscle contractions. EMS, by contrast, contracts muscles more noticeably—great for body training, but too intense for delicate facial work. For daily skincare routines focused on lifting and smoothing the look of skin, true microcurrent is typically the better fit.

    Key Benefits You Can Expect

    • A more lifted look across brows, cheeks, and jawline
    • Softer-looking nasolabial folds and fine lines over time
    • Enhanced definition along cheekbones and lower face contour
    • Decreased morning puffiness via lymphatic support
    • Brighter-looking skin thanks to improved microcirculation
    • Better absorption of conductive gels and hydrating serums used during treatment

    Results are cumulative. Many people notice an immediate “post-workout glow” and subtle lift after a single session, while more pronounced improvements usually develop after 4–8 weeks of consistent use.

    What You’ll Need

    To maximize comfort and efficacy, assemble a simple kit and keep it within reach so you’re more likely to stay consistent.

    • Conductive gel or serum formulated for microcurrent (aloe-based, ionically conductive formulas work well)
    • A clean, dry face—free of oils and heavy creams
    • A mirror and good lighting to track symmetry and technique
    • Optional: hydrating mist to re-wet gel mid-session if it dries
    • Optional: fragrance-free moisturizer to seal in hydration post-treatment
    • Recommended devices: We recommend the FOREO BEAR 2 Microcurrent Facial Toning Device for its smart intensity control and ergonomic design. One of the best options is the NuFACE Trinity+ Smart Advanced Facial Toning Device if you want app-guided routines and accessory compatibility.

    How to Choose the Right Microcurrent Device

    Shopping for a tool can be overwhelming. Focus on features that directly affect comfort, safety, and consistency.

    • Current range and control: Multiple intensity levels help you fine-tune comfort and efficacy.
    • Waveform and delivery: Multi-wave or variable pulse designs can target both superficial and deeper tissues more evenly.
    • Probe or sphere design: Dual-sphere heads glide easily and allow precise holds along contours.
    • App guidance and routines: Built-in timers and visual guides reduce guesswork.
    • Battery life and portability: Longer runtime equals fewer charges; compact devices are great for travel.
    • Safety: Features like automatic cut-off when conductivity drops, and reputable certifications, matter.
    • Accessories and ecosystem: Interchangeable heads or curated programs add versatility over time.
    • Warranty and brand support: A strong warranty and accessible customer service make a difference for daily-use tools.

    If app coaching and an expandible system appeal to you, check out the NuFACE Trinity+ Smart Advanced Facial Toning Device on Amazon. Prefer a sleek device with smart intensity, T-Sonic massage, and a compact build? One of the best options is the FOREO BEAR 2 Microcurrent Facial Toning Device.

    Step-by-Step At-Home Routine

    1. Cleanse: Start with a thorough cleanse to remove oils and SPF. Pat completely dry.
    2. Prep: Apply a conductive gel in a thin, even layer. If your skin is very dry, mist lightly with water first, then apply gel to improve glide and conductivity.
    3. Set intensity: Begin at a low level and increase gradually. You should feel little to no discomfort when your gel is adequately wet.
    4. Lower face and jaw: Glide from chin to ear along the jawline, pausing for 2–5 seconds at the angle of the jaw. Repeat 3–4 times per side.
    5. Cheeks and nasolabial area: Lift from the corner of the mouth toward the top of the ear. Use gentle, consistent pressure and hold at the top of each glide.
    6. Under the cheekbone: Place the spheres under the malar bone and hold to encourage a sculpted look.
    7. Brow and forehead: Work from the inner brow to the temples, then from brow to hairline in vertical “lifts,” always avoiding the eyelids.
    8. Symmetry check: Compare both sides in the mirror and add one or two extra holds where you want more lift.
    9. Finish and seal: Rinse off any residue, then apply a simple moisturizer or hydrating serum.

    For guided timing and placement, Check out the NuFACE Trinity+ Smart Advanced Facial Toning Device on Amazon; the app offers short routines for busy mornings or longer, sculpting sessions. If you prefer a compact, travel-friendly tool with smart features, we recommend the FOREO BEAR 2 Microcurrent Facial Toning Device for its intuitive programs and ergonomic grip.

    Frequency and Progress Timeline

    To build momentum, aim for 5 sessions per week for the first 4–6 weeks, then maintain 2–3 times weekly. Plan on 5–10 minutes for a quick freshen-up and 15–20 minutes for full sculpting. Take photos under the same light every two weeks to track gradual changes in lift, symmetry, and skin radiance.

    Pro Tips for Better Results

    • Hydrate generously: Well-hydrated skin conducts current more comfortably and effectively.
    • Keep gel wet: If it dries mid-pass, mist with water rather than adding more product.
    • Slow, intentional glides: Rushing reduces contact time and limits the lifting effect.
    • Target holds: Pause for a few seconds at brow tails, cheek apex, and jaw angle to emphasize lift.
    • Pair wisely: Use microcurrent on clean skin; apply actives like vitamin C or peptides afterward. If using retinoids, alternate nights if you notice sensitivity.
    • Stack smartly: Red light or LED masks can complement microcurrent by supporting skin vitality; use LED before microcurrent or on alternate days.
    • Stay consistent: Smaller, frequent sessions outperform sporadic marathon routines.

    Safety and Who Should Avoid Microcurrent

    Microcurrent is generally well-tolerated when used as directed. However, do not use it if you have a pacemaker or implanted electronic device, a history of seizures, active cancer, or if you are pregnant unless cleared by your healthcare provider. Avoid using it over areas with open wounds, active infections, severe cystic acne, or over the thyroid area. If you have metal implants in the face, consult a professional before use.

    Possible Side Effects

    Some users report a mild tingling, a temporary metallic taste, or slight redness that resolves quickly. These typically indicate low gel coverage or too-high intensity. Lower the setting, re-wet the gel, and avoid pulling the skin. If irritation persists, discontinue and consult a professional.

    Maintenance and Hygiene

    After each session, power off the device and wipe the spheres with a soft, damp cloth. Avoid harsh alcohols that can degrade finishes. Don’t submerge the handle. Store your tool in a dry place and charge it according to the manufacturer’s schedule to preserve battery health. Replace conductive gel as needed; expired or poor-quality gels can reduce glide and comfort.

    Frequently Asked Questions

    How quickly will I see results?

    You may notice an instant, temporary lift and glow after your first session. Long-term benefits—like improved-looking contour and softer fine lines—build gradually over 1–2 months of consistent use.

    How long do results last?

    The immediate lift can last 24–72 hours. Maintenance sessions two to three times weekly help sustain your improvements. Before events, a short session can boost radiance and definition.

    Can I use microcurrent if I have Botox or fillers?

    Yes, but wait at least two weeks after injectables, and avoid applying direct current over freshly treated areas until cleared by your provider. Many users find microcurrent complements in-office treatments by keeping muscles toned and skin vibrant.

    Do I need a special gel?

    You need an ionically conductive gel to carry current comfortably and effectively. Aloe-based formulas work well. Avoid thick, oily creams during the session, as they block current.

    Is daily use okay?

    Most people can use microcurrent daily at low to moderate intensity. If you experience sensitivity, scale back to every other day and keep sessions shorter while maintaining consistency.

    What about sensitive skin?

    Start at the lowest intensity and keep the gel visibly wet. Limit the first few sessions to 5–7 minutes. If redness lingers, stop and check with a professional.

    Is there a learning curve?

    Yes, but app-guided routines and built-in timers simplify it. The NuFACE Trinity+ Smart Advanced Facial Toning Device offers stepwise guidance, and the FOREO BEAR 2 Microcurrent Facial Toning Device provides intuitive controls to shorten the learning curve.

    At-Home vs. Professional Microcurrent

    Professional microcurrent sessions use higher-end machines and trained techniques, which can yield dramatic single-visit results and custom protocols. At-home devices prioritize consistency and convenience; while each session may be gentler, your steady routine makes up for it. Many users combine quarterly professional sessions with at-home maintenance to amplify and extend results.

    Setting Realistic Expectations

    Microcurrent won’t replace surgical lifting, but it can noticeably refresh the face, especially in the upper cheeks, brow area, and jawline. Expect incremental improvements rather than overnight transformation. Track progress with photos, stay diligent with your routine, and fine-tune your technique in front of a mirror to improve symmetry. The combination of regular sessions, adequate hydration, and steady gel conductivity is what moves the needle.

    Conclusion

    Microcurrent facial devices offer a practical way to lift, tone, and brighten the look of your complexion from home. Success hinges on consistency, proper conductivity, and a technique that includes slow glides and targeted holds. If you want app guidance and an expandable system, Check out the NuFACE Trinity+ Smart Advanced Facial Toning Device on Amazon. If a compact, smart-intensity device sounds ideal, we recommend the FOREO BEAR 2 Microcurrent Facial Toning Device. Choose the model that fits your lifestyle, keep your sessions short and steady, and you’ll build a routine that delivers a lifted, energized glow day after day.

    Recommended Products

    Ready to get started? Check out these top-rated products:

  • Pore Vacuum Guide: Devices, Technique, and Aftercare

    Pore Vacuum Guide: Devices, Technique, and Aftercare

    Professional pore vacuum extractors promise a clearer-looking complexion by loosening and lifting oil, oxidized sebum, and debris from congested pores. When used correctly, these tools can complement exfoliants and facials while reducing the urge to pick. The key is pairing the right device with a gentle technique and good aftercare to avoid irritation or bruising. Below is a practical guide to choosing, using, and maintaining a pore vacuum like a pro, including recommendations for devices with hydro-infusion and microdermabrasion features that elevate results.

    Recommended Products

    To get professional-level results at home, you need a device that balances power, control, and hygiene. Start with these top picks and essentials:

    How Professional Pore Vacuums Work

    Pore vacuum extractors create a controlled negative pressure to encourage the contents of a congested pore to rise toward the surface. On advanced units, that suction is paired with one or more enhancements:

    • Hydro-infusion: A steady flow of solution softens sebum and assists debris removal while rinsing the area. One of the best options is the BeautyBio GLOfacial Hydro-Infusion Pore Cleansing Tool with Blue LED Clarifying Light, which combines suction with a targeted fluid stream for smoother passes.
    • Blue LED: Blue wavelengths can help minimize the appearance of acne-prone skin by targeting the environment that supports blemish formation. This doesn’t replace skincare, but it complements an extraction routine.
    • Microdermabrasion: Diamond tips gently resurface the top layer, improving texture and helping to free trapped oil and dead skin. One of the best options is the Microderm GLO Diamond Microdermabrasion Machine and Suction Tool, which pairs exfoliation with adjustable suction for precise control.

    When used with a light hand and proper prep, these devices can visibly reduce the look of blackheads on the nose, chin, and forehead while supporting smoother makeup application and fewer clogged spots.

    Choosing the Right Extractor

    Suction Power and Control

    Look for a device with multiple intensity levels rather than a single high-power setting. Good tools allow you to tailor suction to different zones: low for cheeks and sensitive areas, medium for forehead and jaw, and carefully increased power on sturdier areas like the nose. A pressure range with smart pulsation can help dislodge buildup with less tugging.

    Tip Shapes and Materials

    Interchangeable tips help you work efficiently:

    • Small round tips focus on crevices around the nose.
    • Larger oval tips lift along the T-zone and cheeks.
    • Diamond tips (on microderm units) assist with controlled exfoliation to improve skin texture and reduce dullness.

    If micro-resurfacing appeals to you, the precision and diamond-tip selection on the Microderm GLO Diamond Microdermabrasion Machine and Suction Tool make it a strong candidate for combination routines.

    Hygiene and Maintenance

    Clear internal chambers, replaceable filters, and washable tips make cleanup straightforward and help prevent bacteria buildup. Hydro-infusion devices should also be easy to flush after use to avoid residue and odors. Devices with translucent reservoirs let you monitor flow and cleanliness in real time.

    Safety Features and Extras

    Features like time-limited modes, auto-pause when pressed too firmly, and blue LED support a safer experience. If you’re new to extraction, a hydro-infusion system can provide extra slip and reduce the likelihood of bruising. For example, Check out the BeautyBio GLOfacial Hydro-Infusion Pore Cleansing Tool with Blue LED Clarifying Light on Amazon for a gentle yet thorough approach.

    Step-by-Step Routine for Safe Extraction

    1. Cleanse and soften. Wash with a mild cleanser, then steam for 5–7 minutes or press a warm, damp towel on congested areas. The goal is to loosen sebum, not to overheat your skin.
    2. Prepare your device. Fit a clean tip, insert a fresh filter if applicable, and choose the lowest suction to start. If using hydro-infusion, fill the reservoir with the recommended solution or distilled water.
    3. Create slip. Apply a water-based serum or essence to reduce friction. Hydro-infusion devices inherently provide slip as they dispense fluid; that’s why many users favor them for sensitive skin.
    4. Work in sections. Anchor the skin with one hand and glide the tip slowly in short, overlapping passes. Keep the tool moving—hovering in one spot increases the chance of a hickey-like mark.
    5. Tune the intensity. If nothing lifts after two gentle passes, step up one level on sturdier areas like the nose. Avoid the delicate eye area and active breakouts.
    6. Limit your time. Spend 3–5 minutes total for your first session and cap at 8–10 minutes once you’re comfortable. Over-extraction can compromise the skin barrier.
    7. Rinse and calm. Pat away residue, then apply a soothing, non-comedogenic hydrator with ingredients like panthenol or hyaluronic acid. Follow with a light moisturizer.
    8. Protect. Finish with SPF in the morning. Newly clarified pores are more susceptible to UV irritation.

    If you prefer a fluid-assisted routine that rinses as it extracts, Check out the BeautyBio GLOfacial Hydro-Infusion Pore Cleansing Tool with Blue LED Clarifying Light on Amazon. For weekly texture refinement before extraction days, We recommend the Microderm GLO Diamond Microdermabrasion Machine and Suction Tool to gently loosen dead cells that trap sebum.

    Troubleshooting and Pro Tips

    • Persistent blackheads on the nose: Use a salicylic acid (BHA) serum 2–3 nights per week between extraction sessions to keep pores clearer longer.
    • Temporary redness: This is common immediately after use and should fade within an hour. If redness lasts longer, reduce suction or session length next time.
    • Hickey-like marks: These indicate you hovered or pulled too strongly. Keep the tip moving and lower the intensity, especially on thin skin.
    • Dryness or flaking: Pair extraction with barrier-supportive products (ceramides, squalane) and limit sessions to once weekly at first.
    • Clogged tips or filters: Rinse immediately after use, flush hydro chambers with warm distilled water, and disinfect tips. Replace filters on schedule.
    • Uneven results: Work methodically—forehead, nose, chin, then cheeks—making two passes max per area. More passes do not equal better results.

    Who Should Avoid or Modify Use

    Skip at-home extraction on active cystic acne, sunburned or windburned skin, rosacea flares, eczema patches, or areas treated with recent chemical peels or retinoids. If you’re prone to broken capillaries or have a bleeding disorder, consult a dermatologist first. Those on photosensitizing medications should use LED features with guidance from a professional.

    Professional Pore Vacuums vs. Alternatives

    • Manual comedone tools: Effective in skilled hands but easier to overdo and can create dents or scars if you press. Vacuums spread force over a larger surface and are generally gentler when kept moving.
    • Hydrofacial-style devices: Combine fluid infusion with extraction for reduced friction and better comfort. Home hydro tools like the BeautyBio model bring a similar concept to a handheld format.
    • Microdermabrasion: Excellent for smoothing texture and loosening pore blockages. Using a diamond-tip device like the Microderm GLO Diamond Microdermabrasion Machine and Suction Tool before or between extractions can reduce the need for higher suction.
    • Chemical exfoliants: Regular BHA and gentle AHA use helps prevent the buildup that leads to congestion. Pair with periodic vacuum sessions for maintenance rather than relying on extraction alone.
    • Clay masks: Useful for absorbing surface oil pre-extraction, especially on the T-zone, but won’t remove oxidized plugs by themselves.

    Maintenance and Hygiene Checklist

    • Before each session: Wash your hands, cleanse your face, and inspect tips for cracks or residue.
    • During use: Wipe the tip with a clean cotton round if you see buildup; replace filters mid-session if they saturate.
    • After use: Disassemble, rinse tips and reservoirs in warm water, then disinfect and air-dry fully before reassembly.
    • Weekly: Deep-clean the device attachments; check suction ports for debris and ensure gaskets and seals are intact.
    • Monthly: Replace filters and worn tips as recommended by the manufacturer to maintain stable suction and hygiene.

    Building a Balanced Routine

    For most skin types, extraction once per week is sufficient. On off days, focus on prevention and recovery: gentle cleansing, hydrating serums, barrier-repair moisturizers, and targeted exfoliants 2–3 times per week. If you’re using retinoids, schedule extractions on a non-retinoid night to minimize irritation. Consistency with everyday care will do more to keep pores looking clear than frequent vacuuming.

    Those who prefer a smoother, fluid-lubricated glide and added blue LED support will appreciate the hydro-infusion approach—One of the best options is the BeautyBio GLOfacial Hydro-Infusion Pore Cleansing Tool with Blue LED Clarifying Light. If texture and dullness are primary concerns, pairing extraction with controlled resurfacing from the Microderm GLO Diamond Microdermabrasion Machine and Suction Tool can deliver a more refined finish.

    Conclusion

    Professional pore vacuum extractors can be effective when used with care, thoughtful device selection, and a skin-friendly routine. Start with low suction, keep the tip moving, and treat extraction as a periodic maintenance step—not a daily habit. Hydro-infusion models reduce friction and add comfort, while microdermabrasion devices help address texture and stubborn buildup. With clean tools, gentle technique, and consistent aftercare, you can minimize the look of blackheads and congestion while preserving your skin’s barrier. If you want a streamlined, water-assisted experience with clarifying light, Check out the BeautyBio GLOfacial Hydro-Infusion Pore Cleansing Tool with Blue LED Clarifying Light on Amazon. For those seeking a polished complexion with added resurfacing, We recommend the Microderm GLO Diamond Microdermabrasion Machine and Suction Tool. Choose the tool that aligns with your skin goals, practice consistency, and your pores—and makeup—will look better for it.

    Recommended Products

    Ready to get started? Check out these top-rated products:

  • Squalane: The Luxe, Lightweight Oil for Radiant Skin

    Squalane: The Luxe, Lightweight Oil for Radiant Skin

    Velvety, fast-absorbing, and remarkably skin-compatible, squalane has earned a place among luxury skincare staples. Derived from sustainable sources like sugarcane, this lightweight oil mimics the skin’s natural lipids to deliver cushiony moisture without heaviness. Whether your routine leans minimal or maximal, a well-formulated squalane elevates glow, supports barrier function, and layers beautifully under sunscreen and makeup.

    What Makes Squalane Feel Luxe on Skin

    Luxury skincare is about performance plus pleasure. Squalane delivers both by offering high slip with no stickiness, a satin finish instead of greasiness, and a silky afterfeel that makes complexion look instantly smoother. Because it is highly stable and non-comedogenic, squalane resists oxidation and suits a wide range of skin types. The result is a calm, supple complexion that looks plump without feeling occlusive.

    Another hallmark of luxury: consistency across climates and routines. Squalane shines in this regard; it remains fluid in cold weather and doesn’t weigh heavy in humid environments. The sensorial experience—glide, comfort, and quick absorption—makes it an ideal final touch in both minimalist and multi-step regimens.

    Recommended Products

    • Check out the Biossance Squalane + Vitamin C Rose Oil on Amazon for a brightening, cushiony glow that pairs squalane with antioxidant vitamin C and a luxurious rose aroma.
    • We recommend the Indie Lee Squalane Facial Oil for a pure, minimalist formula ideal for sensitive or combination skin.
    • A soft microfiber cloth to remove cleanser without tugging.
    • A hydrating essence or toner to amplify squalane’s sealing effect.
    • Broad-spectrum sunscreen to lock in your glow through the day.

    Building a Luxury Squalane Ritual

    A thoughtful sequence turns a simple oil into a spa-like moment. Follow these steps to transform texture, radiance, and comfort:

    1. Cleanse thoroughly: Use a gentle, low-foaming cleanser to avoid stripping. Pat—don’t rub—skin dry to leave a hint of dampness.
    2. Lay a hydration base: Apply a water-based essence or serum with humectants. This creates the moisture reservoir that squalane will help seal in.
    3. Targeted treatments: Layer actives like peptides or niacinamide next. Allow each step to absorb for 30–60 seconds for a luxe, unrushed feel.
    4. Oil application: Warm 2–4 drops of squalane between fingertips, press over cheeks, forehead, and neck, then glide outward. For daytime radiance, many reach for something brightening—one of the best options is the Biossance Squalane + Vitamin C Rose Oil.
    5. Moisturizer (optional): If you’re dry or in cold climates, massage a lightweight cream on top. If you’re combo/oily, squalane alone may be enough.
    6. Finish and protect: In the morning, always apply sunscreen. At night, a calming layer of the Indie Lee Squalane Facial Oil as the final step provides a quiet, comforting finish.

    Why Squalane Works: The Science in Brief

    Squalane is the hydrogenated, stable version of squalene—a lipid naturally found in human sebum. By mimicking components of our skin’s protective barrier, squalane integrates seamlessly to reduce moisture loss, improve softness, and minimize the appearance of fine lines. Because it is lightweight and non-occlusive, it helps balance the feel of skin without congesting pores. In many formulas, squalane also acts as an elegant emollient that improves spreadability and enhances the performance of other ingredients.

    Pairing Squalane with Active Ingredients

    Squalane serves as a cushioning vehicle that helps actives apply more evenly and feel gentler. Combining it with antioxidants and brighteners elevates results:

    • With vitamin C: For morning luminosity, squalane plus stable forms of vitamin C can support a more even tone and polished glow. Check out the Biossance Squalane + Vitamin C Rose Oil on Amazon to streamline this pairing in one step.
    • With retinoids: At night, a layer of squalane after retinoid application can reduce potential dryness without diluting efficacy. Opt for a simple formula like the Indie Lee Squalane Facial Oil to keep the routine gentle and focused.
    • With exfoliating acids: If you use AHAs/BHAs, apply them first, let skin settle, then press in squalane to restore comfort and sheen.
    • With peptides and niacinamide: Squalane’s silky slip helps these barrier-supportive ingredients spread smoothly and reduces micro-tugging during application.

    Customizing for Your Skin Type

    Because of its elegant, non-greasy profile, squalane travels well across skin types. Tailor your approach for the most luxurious result:

    • Dry or mature skin: Use 4–6 drops over damp skin and sandwich with a ceramide-rich cream. The gentle radiance of a vitamin C blend is especially flattering in the morning.
    • Combination skin: Apply 2–3 drops, concentrating on dry zones like cheeks and leaving the T-zone light. A minimalist formula such as the Indie Lee Squalane Facial Oil keeps things balanced.
    • Oily or blemish-prone skin: Counterintuitively, a light squalane layer can feel more breathable than heavy creams. Start with 1–2 drops at night and assess. Keep the rest of your routine uncluttered.
    • Reactive or sensitive skin: Choose clean, streamlined formulas and patch test. Gradually layer a few drops every other night before moving to daily use.

    Texture, Fragrance, and the Luxury Experience

    Luxury is sensorial as much as it is functional. A well-crafted squalane formula glides effortlessly, leaves a soft-focus sheen, and resists pilling beneath sunscreen. Some blends incorporate delicate aromatics—like rose—to enhance the mood of the ritual. If you prefer a sensorial flourish with brightening benefits, one of the best options is the Biossance Squalane + Vitamin C Rose Oil. For purists, an unscented, minimal composition such as the Indie Lee Squalane Facial Oil delivers quiet sophistication without distractions.

    Seasonal Tweaks for Year-Round Comfort

    Adjust your squalane use with climate shifts to maintain that expensive-skin glow every day:

    • Winter: Increase drop count and layer over a hydrating serum and under a richer cream. Consider a humidifier to minimize transepidermal water loss.
    • Summer: Apply fewer drops and lean on gel moisturizers. Squalane will provide the slip you want without feeling occlusive.
    • Travel: Airplane cabins are notoriously dry. Pat squalane on cheekbones mid-flight to restore suppleness without disrupting makeup.

    Common Mistakes to Avoid

    • Overapplying: More isn’t always better. Excess product can sit on skin and cause makeup to move. Start small and build.
    • Applying to bone-dry skin: Squalane shines when layered over hydration. A mist or lightweight essence increases comfort and glow.
    • Mixing with unstable actives poorly: If you’re experimenting with raw vitamin C powders or high-strength acids, layer carefully to maintain stability and avoid irritation.
    • Skipping sunscreen: A luminous complexion needs daily UV protection to sustain its clarity and bounce.

    Sourcing, Sustainability, and Quality

    Modern luxury skincare values eco-conscious sourcing alongside performance. Sugarcane-derived squalane has become the gold standard for sustainability and consistency, offering a renewable alternative to historically animal-derived options. Quality-focused brands test for purity, stability, and sensory elegance—ensuring each drop delivers comfort without compromise.

    Packaging also contributes to the experience and preservation of the formula. Opaque or tinted bottles protect sensitive co-ingredients; droppers or pumps minimize exposure and make dosing precise. When evaluating options, look for transparent sourcing, cruelty-free commitments, and a track record of rigorous formulation.

    How to Layer with Makeup

    Done right, squalane acts like invisible silk beneath foundation:

    • Prep thin layers: Hydrate, then press in a conservative amount of squalane. Wait a minute for absorption.
    • Choose complementary textures: Lightweight, skin-like base products sit best on squalane’s satin finish.
    • Strategic placement: Concentrate oil on high points—cheekbones and temples—where natural light hits. This prevents unwanted movement in the T-zone.

    Quick Glow Routines

    Time-pressed mornings still deserve a touch of opulence. Try one of these mini rituals:

    • Bright Start: Mist, vitamin C serum, two drops of a squalane-vitamin C blend, sunscreen, lip balm.
    • Office-to-Evening: Refresh with a hydrating spray, press one drop of squalane onto cheekbones, tap in cream highlighter.
    • Post-Workout Calm: Rinse, pat dry, apply a soothing essence, 2–3 drops of a pure squalane oil, and a light moisturizer.

    Who Benefits Most from Squalane

    Anyone seeking a refined, non-greasy finish with visible softness and resilience will appreciate squalane. It suits first-time oil users due to its uncomplicated feel, and it’s a favorite among makeup wearers because it smooths texture without a heavy film. If you crave added radiance with antioxidant support, the brightening blend discussed earlier is a polished choice. If your priority is simplicity and sensitivity, the minimalist option remains a top pick.

    Real-World Pairings to Try

    • Morning Radiance: Hydrating toner, peptide serum, two drops of the Biossance Squalane + Vitamin C Rose Oil, sunscreen.
    • Barrier Support Nightcap: Niacinamide serum, 3 drops of the Indie Lee Squalane Facial Oil, ceramide cream.
    • Event-Ready Skin: Gentle exfoliating toner, hydrating serum, a whisper of squalane to blur texture, lightweight foundation.

    Conclusion

    Luxury squalane oil skincare blends refinement with results: a graceful texture, a soft-focus glow, and day-to-night versatility that respects the skin barrier. Whether you choose a sophisticated antioxidant-infused option or a minimalist, fragrance-light classic, you can build a ritual that feels indulgent and delivers visible comfort and radiance. For bright, cushiony mornings, one of the best options is the Biossance Squalane + Vitamin C Rose Oil. For a serene, simple finish any time of day, we recommend the Indie Lee Squalane Facial Oil. Choose your texture, adjust your drops with the seasons, and let squalane bring a soft, polished luminosity to every step of your skincare journey.

    Recommended Products

    Ready to get started? Check out these top-rated products:

  • Platinum-Infused Skincare: Benefits and Routine Guide

    Platinum-Infused Skincare: Benefits and Routine Guide

    Platinum-infused skincare has moved from red-carpet rumor to a serious category in luxury beauty. Ultra-fine platinum particles are now woven into creams and serums to support skin’s resilience, defend against environmental stressors, and enhance the performance of other high-value actives. If you’re curious whether these opulent formulas are worth the investment, this guide breaks down how they work, who benefits most, and exactly how to build a smart routine around them.

    How Platinum Works in Modern Formulas

    Today’s platinum-infused skincare doesn’t rely on jewelry-grade chunks; it uses technological forms such as colloidal platinum or platinum peptides. These micro-sized particles are prized for their stability and compatibility with skin-friendly bases. In well-balanced formulations, platinum can act as an antioxidant shield, helping neutralize the look of damage from pollution and UV exposure (think dullness, uneven tone, and a tired-looking complexion). Many brands also leverage platinum to support the feel of firmness and elasticity, pairing it with peptides, hydrating polymers, and soothing botanicals.

    Another reason platinum caught the attention of formulators: it can play well with others. When combined with ingredients like hyaluronic acid, ceramides, niacinamide, or retinoids, platinum may enhance the overall sensorial profile and contribute to a more refined, luminous finish. That makes it particularly appealing for mature or stressed skin that needs both performance and a luxurious experience.

    Recommended Products

    To build a targeted routine, start with a hero moisturizer and a night treatment that bring platinum into daily use. Below are standout options that balance indulgence with visible results:

    One of the best options is the La Prairie Platinum Rare Haute-Rejuvenation Cream as a daily anchor for your routine, especially if your skin craves lasting moisture and a refined glow.

    Building a Platinum-Infused Routine

    Morning: Protection and Luminosity

    1. Cleanse: Opt for a gentle, pH-balanced cleanser that preserves the skin barrier.
    2. Prep: Apply a hydrating essence or toner with humectants like glycerin and hyaluronic acid.
    3. Treat: Use a vitamin C serum for antioxidant support and brightening. Let it fully absorb.
    4. Moisturize: Lock in hydration with a platinum-infused cream. Check out the La Prairie Platinum Rare Haute-Rejuvenation Cream on Amazon to combine plush moisture with a subtly firming finish.
    5. SPF: Finish with a broad-spectrum SPF 30–50. Sunscreen is non-negotiable for maintaining results.

    For extra dew, warm a small amount of your cream between your fingers and press it into the skin. This technique encourages even distribution without pilling over serums or sunscreen.

    Evening: Renewal and Recovery

    1. Double Cleanse: Start with a balm or oil to remove sunscreen and makeup; follow with a gentle gel cleanser.
    2. Active Step (optional): Use a mild exfoliating toner 2–3 nights per week if your skin tolerates acids.
    3. Intensive Serum: We recommend the La Prairie Platinum Rare Cellular Night Elixir for a targeted overnight treatment. Apply to slightly damp skin for better slip and absorption.
    4. Moisturize: Seal in the serum with a nourishing cream to minimize transepidermal water loss. If you prefer a cohesive line, layer with the La Prairie Platinum Rare Haute-Rejuvenation Cream.

    On retinoid nights, apply your retinoid after cleansing, then follow with the night elixir and a cream. Increase retinoid frequency slowly to avoid irritation, and adjust the order if your dermatologist advises differently.

    Weekly Enhancers

    • Sheet masks with peptides or ceramides provide a soothing counterpoint to active nights.
    • Gentle micro-exfoliation once per week can help platinum formulas sit more evenly on the skin.
    • Facial massage with a cool tool reduces temporary puffiness and enhances the cream’s slip.

    Ingredient Pairings: What Works and What to Avoid

    Platinum plays nicely with barrier supporters like ceramides, cholesterol, squalane, and fatty acids. These pairings improve comfort and cushion without dulling a luminous finish. Hyaluronic acid and polyglutamic acid are also excellent companions for plumping the look of fine lines.

    Be mindful when combining platinum-rich products with highly acidic or very basic formulas in the same step. To play it safe, separate strong vitamin C (L-ascorbic acid), retinoids, and exfoliating acids into different layers and allow a few minutes between applications. If you notice stinging or pilling, simplify the routine and reintroduce one variable at a time.

    Who Benefits Most from Platinum-Infused Skincare

    • Mature skin seeking improved firmness and glow: Platinum formulas often give an instant smoothing effect while supporting long-term resilience.
    • Urban dwellers exposed to pollution: Antioxidant support helps minimize the look of dullness and uneven tone.
    • Dry or combination-dry skin: The plush textures typical of platinum creams bring comfort without a heavy residue when applied correctly.
    • Sensitive or reactive types: Choose minimalist formulas. Patch test first to ensure the delivery system agrees with your skin.

    If you’re new to luxury skincare, a single high-impact product—such as the La Prairie Platinum Rare Cellular Night Elixir—can be a strategic starting point to anchor your routine before expanding.

    Myths vs. Reality

    • Myth: Platinum alone transforms skin overnight. Reality: Platinum works best as part of a balanced formula with proven hydrators, peptides, and antioxidants—and with daily SPF.
    • Myth: Heavier equals better. Reality: Texture should match your skin type. Even rich creams should absorb cleanly without greasiness.
    • Myth: You must overhaul your entire regimen. Reality: Introduce one platinum product at a time, then build if you like the results.

    How to Evaluate a Platinum-Infused Product

    1. Position on the ingredient list: While not definitive, earlier placement can indicate higher concentration. Consider overall formula synergy, not just one ingredient.
    2. Supporting cast: Look for barrier builders (ceramides), hydrators (HA), and signal peptides for a comprehensive approach.
    3. Packaging: Airless pumps and opaque containers help keep sensitive actives fresh.
    4. Texture and finish: Aim for a silky spread that settles without pilling under sunscreen or makeup.
    5. Patch testing: Apply to the inner arm or behind the ear for 24–48 hours before full-face use, especially with potent night serums.

    Storage and Application Tips

    • Keep products away from direct sunlight and heat; a cool, dry cabinet is ideal.
    • Use clean hands or a sanitized spatula to minimize contamination, especially with jar packaging.
    • Apply to slightly damp skin to enhance slip and reduce the amount needed per application.
    • Layer thinnest to thickest: watery essences first, then serums, then creams, then SPF by day.
    • Give each layer 30–60 seconds to settle before applying the next to prevent pilling.

    Common Questions

    Can platinum-infused products replace my retinoid or vitamin C?

    No. Consider platinum a complementary component that brings antioxidant support and sensorial elegance. Retinoids, vitamin C, and sunscreen remain pillars of an evidence-based routine.

    Are these formulas suitable for acne-prone skin?

    Yes, with careful selection. Look for non-comedogenic claims and lighter textures. Introduce one product at a time and observe how your skin responds, particularly if you’re using exfoliating acids or benzoyl peroxide.

    How long until I see results?

    Instant benefits often include smoother feel and enhanced radiance. For firmer-looking skin and improved tone, evaluate after 6–8 weeks of consistent use, factoring in nightly recovery products like the La Prairie Platinum Rare Cellular Night Elixir.

    Budgeting and Value

    Platinum-infused products occupy the highest tier of skincare pricing. To maximize value, identify your primary goal (firmness, glow, hydration) and choose the step where you’ll see the biggest impact. Moisturizers influence feel and finish throughout the day, while night serums focus on targeted renewal. If your priority is all-day comfort with a refined, lifted look, one of the best options is the La Prairie Platinum Rare Haute-Rejuvenation Cream. For recovery and overnight radiance, the concentrated approach of the La Prairie Platinum Rare Cellular Night Elixir makes strategic sense.

    A Sample 7-Day Onboarding Plan

    • Days 1–2: Introduce the night serum only, applying every other night and finishing with a neutral moisturizer.
    • Days 3–4: Add the platinum moisturizer in the morning; monitor for any sensitivity.
    • Days 5–7: Increase the night serum to nightly if skin is calm; otherwise maintain alternate nights. Keep sunscreen daily.

    Adjust pacing if you already use retinoids or exfoliating acids. When in doubt, alternate actives to minimize the chance of irritation.

    Conclusion

    Platinum-infused skincare products bring a rare blend of performance and pleasure to a routine focused on firmness, radiance, and resilience. By pairing cutting-edge platinum complexes with barrier-strengthening ingredients, these formulas deliver both instant refinement and long-view results when used consistently alongside daily sunscreen. Whether you begin with a cushiony day cream or a potent nighttime elixir, prioritize texture, packaging, and compatibility with your existing actives.

    For a well-rounded entry point, consider anchoring your mornings with the comforting luminosity of the La Prairie Platinum Rare Haute-Rejuvenation Cream and letting overnight renewal take center stage with the La Prairie Platinum Rare Cellular Night Elixir. With smart layering and consistent use, you’ll elevate your regimen—and your results—without guesswork.

    Recommended Products

    Ready to get started? Check out these top-rated products:

  • Hello world!

    Welcome to WordPress. This is your first post. Edit or delete it, then start writing!